Renters and tight-kitchen cooks often face the same problem: limited space and a cluttered freezer that hides meals. This introduction frames a simple, renter-friendly plan that improves visibility, cuts waste, and speeds meal prep.
The approach favors handled clear bins, freezer-safe labels, and measuring before buying to avoid wasted purchases. Caroline Dilbeck’s advice—keep it simple—guides the method: broad categories, easy access, and an annual reset instead of a hard-to-maintain inventory.
What readers can expect: practical tools, pros and cons, and routines that don’t require permanent changes. The guide previews handled clear bins, wire baskets, labels, freezer bags versus a vacuum sealer, and dry-erase inventory boards.
This section is written for apartment kitchens, shared homes, and anyone storing seasonal backstock. The organizing principle is clear: zones plus visibility to maximize space and make the freezer usable on busy nights. A later product comparison will show which system fits each freezer style.
Key Takeaways
- Simple, renter-safe solutions improve retrieval and reduce duplicates.
- Handled clear bins and labels boost visibility and cut food waste.
- Measure before buying to make the most of limited space.
- Use broad zones and an annual reset to keep the system sustainable.
- Compare bins, baskets, labels, and sealing options for your setup.
- See the fridge storage guide for related tips and product picks.
Why small freezers get out of control and what a “good system” fixes
Clutter starts when bulky packaging and loose bags crowd a compact appliance, hiding what’s inside. Shoppers buy duplicates because they cannot see current stock. Boxes and round tubs trap smaller packets beneath them.
The door-open digging cycle wastes time and chills the interior. Long searches let cold air spill out, which makes the unit run longer and stresses frozen food.

The real problems: wasted space, lost food, and digging at the door
Round containers and half-empty boxes create air gaps that cut usable room. That wasted space means fewer usable shelves and more hidden items.
The goal: zones + visibility so you can find items fast
A good system fixes lost items, speeds access, and builds a simple habit for putting food back where it belongs. Group meat, veggies, meals, and snacks into clear pull-out bins or handled baskets to keep things visible.
When a second freezer helps and when it adds clutter
A second unit is worth it for bulk buys, garden harvests, or emergency prep. Pair a garage unit for long-term backstock with the kitchen unit for near-term meals to cut daily rummaging. If the problem is missing categories or labels, buy less gear and simplify first.
- Spiral cause: bulky packaging traps smaller packets and creates duplicate purchases.
- Door digging: searching wastes time, leaks cold air, and raises temperature swings for food.
- Practical fix: measure shelves, purge odd shapes, then add pull-out bins and labels as needed.
Quick reset method for any freezer before you buy products
Start with a quick purge: take everything out, sort by type, and immediately discard freezer-burned or unknown items. This renter-friendly reset costs nothing and clears the space so any future purchases actually fit and help.

Declutter and triage
Remove every item and group into clear piles: meat, veggies, prepared meals, snacks, breakfast, and dessert. Toss freezer-burned food and mystery containers that rarely get eaten.
Triage prepared meals by keeping the next one to two weeks in the most accessible spot and moving long-term packs to a backstock zone.
Measure before you buy
Make sure to measure interior width, shelf depth, drawer height, and door bin depth so bins slide in and lift out easily. Also check for obstructions like ice-maker housings.
- Measure shelf depth and clearance
- Measure drawer interior height
- Measure door bin depth and any obstructions
Set broad categories and simple maintenance
Use broad, stable categories that match how people cook. Broad zones survive busy weeks and make it easy to put items back where they belong.
Label early: even temporary tape labels stop mystery food from returning. A once-a-year reset plus a quick monthly front-face tidy will beat an elaborate inventory most households won’t keep.
For related routing and product ideas to pair with this method, see kitchen storage ideas.
Best small freezer organization essentials that work in rentals and tight kitchens
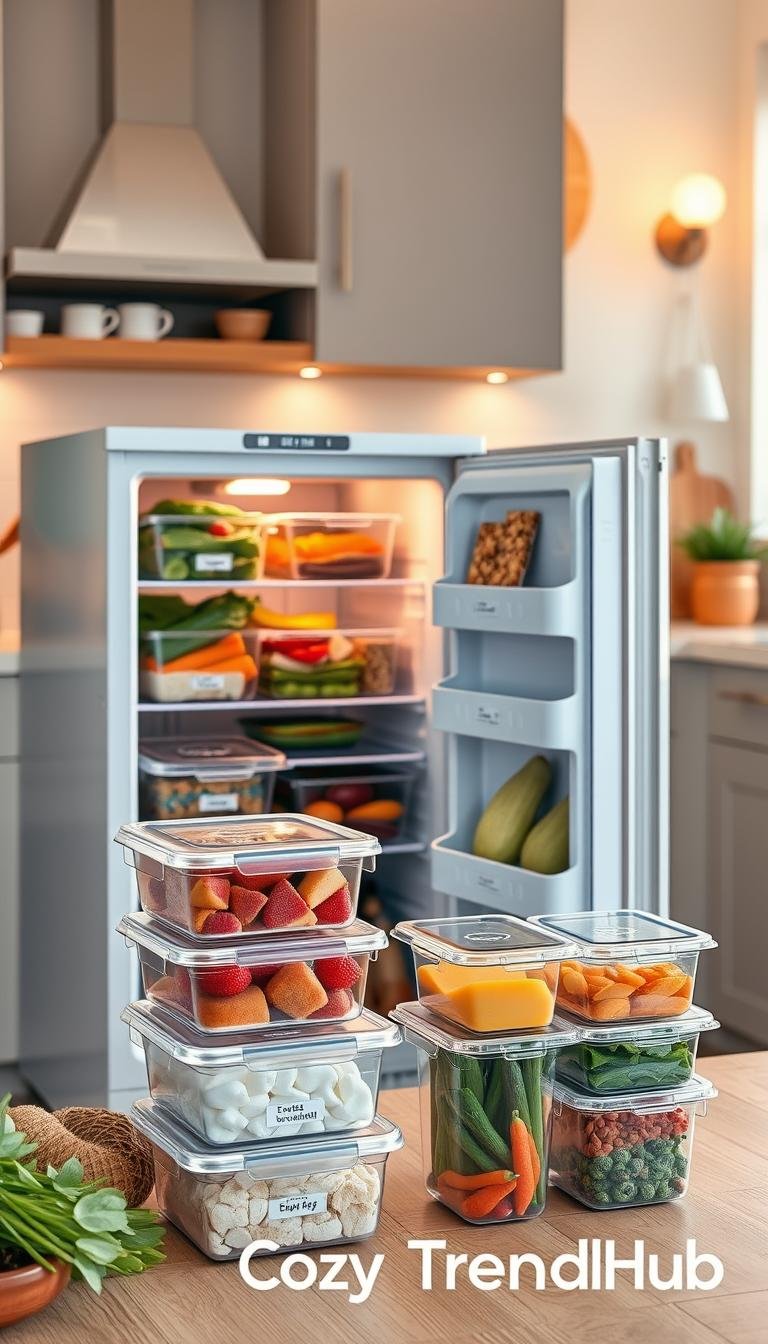
Choose a few removable tools that give quick wins: clear pull-out bins, cold-proof labels, and flat-packing supplies.
Handled clear bins for grouping and quick access
Who they suit: renters and families who need fast retrieval without permanent installs.
What they solve: turn loose packs into pull-out drawers and boost visibility at a glance.
Pros: handled bins are budget-friendly and easy to lift. Use clear styles so contents show through.
Cons: oversized bins can reduce flexibility. Measure shelf depth and handle clearance before buying.

Freezer labels that stick in cold, wet conditions
Labels are ideal for shared homes where anyone puts things away. Choose adhesive rated for frost or removable laminated tags that do not damage surfaces.
Look for labels that remain legible when wet. Removable options protect renter walls and doors.
Flat-packing with bags vs. a vacuum sealer
Freezer bags: best for flexible stacking and quick prep. Flat packs create tidy files but need careful sealing to avoid leaks.
Vacuum sealer: best for bulk buyers, hunters, and meal preppers. It reduces air and lowers freezer burn, at the cost of upfront expense and storage space for the device.
Dry-erase inventory when paper lists fail
A magnetic dry-erase board stuck to the appliance is the easiest way to update an inventory and stop duplicate purchases.
Place it on the side or nearby wall and list packs and dates. Update as items are used to keep the system helpful and simple.
- Buying considerations for later comparison: bin size and handle clearance, label adhesion in frost, bag thickness and freezer rating, and board placement.
- Starter kit rule: a few consistent tools used well beat a complex system that is abandoned.
For related product picks and tests to compare options, see the fridge organizer guide for shopping ideas and side-by-side features.
Bottom freezer drawer organization that prevents the “black hole” effect
A deep drawer can act like a black hole where loose packs disappear and spills spread. This section shows renter-friendly, no-mod methods to keep food visible and tidy.

Top drawer: file and side-stack for flat items
File flat packs of fruits, veggies, ice packs, and prepared meals on their sides so labels face up. Side-stacking ice packs saves space and keeps cold where it’s needed.
Bottom drawer: make the built-in divider work
Treat the divider as the spine of the plan. Use it to create two steady zones so items do not drift with each load.
A single lift-out bin for chicken and fish
One bin for chicken and fish prevents leaks and makes it easy to lift and scan what sits underneath. Place red meat or bulk proteins on the other side.
Bulky bags—nuggets, broccoli, or odd shapes—belong at the very base. Corners and uneven bottoms hold them without wasting flat shelf space.
„Keep zones predictable: the left side holds bulk proteins while the right side stores ready-to-use packs.“
| Component | Why it helps | Downside | Shopping note |
|---|---|---|---|
| Built-in divider | Creates two stable zones | Limited if divider is shallow | Measure divider depth |
| Lift-out bin | Contains leaks, quick scan | Tall bins can catch on lip | Choose low-profile handles |
| Base for bulky bags | Uses odd corners efficiently | Can hide very small items | Place flat packs nearby |
For related storage ideas and product picks, see pantry storage picks.
Chest freezer and deep freezer organization for small garages and seasonal backstock
Deep freezers filled for winter harvests can become slow, inefficient treasure hunts without clear zones. Vertical stacking hides older packages and leaves the lid open while someone searches, which wastes time and lets cold air spill out.

Why these units lose food and cost time
Digging raises temperature swings and makes the motor run longer. The result: more electricity use and more freezer burn on long-stored food.
Bins vs. reusable shopping bags
A bin system gives fixed zones and easy lifts. It is the clear choice for people who want predictable spots and quick scans.
Reusable bags collapse as they empty and work well in tight chest units. Color-code and label them so everyone follows the same rule.
- Bins: durable, easy to lift, keep categories steady.
- Bags: flexible, space-saving, collapse for seasonal shifts.
Make a freezer map and tape it to the lid
Create a simple diagram showing where each group lives. Laminate or tape the map to the lid so anyone can find items without emptying the unit.
„A visible diagram cuts search time and keeps seasonal stock rotating.“
Protect the interior and stage food safely
Rigid baskets can dent the interior. Place a soft liner under them or put them atop bags to protect the surface.
During a clean-out, use a cooler first. If one isn’t available, wrap packs in blankets with a moisture barrier to slow thawing.
Note for renters and garage units: make sure to choose garage-ready models when you replace equipment, and prefer sturdy bags with flat bottoms over thin plastic. For product picks that help keep a tidy system without overbuying, see this starter kit guide.
Side-by-side freezer organization for narrow shelves and door storage
Narrow shelves in side-by-side freezers make piles unstable and force repeated door searches. That instability hides items and increases door-open time. A focused layout keeps things visible and cuts wasted cold air.

Corral messy meat low with bins
Use clear, low-profile bins as corrals for leak-prone meat. Place them on the lowest shelf so drips miss ready-to-eat foods. Clear bins improve visibility and speed scans for meal planning.
Door strategy for bags and small foods
Store flexible bags and smaller foods—frozen vegetables, smoothie mixes, and butter—in the door to free shelf space. Reserve the interior for items that need steadier cold.
Stack flat boxes to build vertical shelves
Lay flat boxes like pizzas as a base layer. They create a stable platform for casseroles and broths and prevent soft bags from collapsing.
Labels matter: mark bins and door shelves so everyone returns foods to the right place. Simple labels reduce duplicate buys and keep the system working.
| Strategy | Why it helps | Downside | Buying note |
|---|---|---|---|
| Low clear bins | Contain leaks, improve scans | Too tall bins may catch on lips | Match shelf depth; choose low handles |
| Door storage | Frees shelf space for stackables | Slightly warmer than interior shelves | Use for tolerant foods; label shelves |
| Flat boxes as base | Creates vertical support, protects bags | Boxes can take extra room if bulky | Stack thin boxes; rotate older items |
For product picks geared to side units, see a practical freezer organizing guide and a curated kitchen storage mix for compatible bins and labels.
Top freezer organization for small apartments and shared households
A tidy top compartment saves time for everyone who shares a kitchen. In many rentals the top shelf is shallow and busy, so limits matter more than gadgetry. Caroline Dilbeck’s rule—less is more—is especially useful here: keep clear sight lines and space to lift bins.

Less is more: avoid overfilling so items don’t avalanche
Overfilling makes items tumble and hides smaller packs behind boxes. That leads to lost food and frustrated roommates.
Leave a visible gap in front of bins so items can be lifted without a mess. This simple habit prevents avalanches and keeps the top shelf usable.
Bins for meat categories like chicken, beef, and fish
One bin per meat type reduces cross-contamination risk and speeds unloading after shopping. Use shallow, handled bins labeled for chicken, beef, and fish so everyone returns packs to the right spot.
Choose perforated styles for airflow to limit frost buildup and to let drains dry between deep cleans.
Side-stack breads and boxed meals on the top shelf for easy access
Side-stacking keeps labels facing outward so roommates can read contents at a glance. Thin boxes act as a platform that prevents soft bags from being crushed.
Rotate older boxes forward to cut waste and keep quick meals visible for busy nights.
Door strategy for ice packs and frozen vegetables
Reserve door bins for flexible items like ice packs and frozen vegetables. These tolerate slight temperature swings and free the main top area for bulk packs and meats.
- Pros: top units are common in rentals and cost-effective.
- Cons: they need strict limits on bulk boxes or items will avalanche.
- Buying note: pick shallow, low-handle bins that pull forward easily; prefer perforated designs to reduce frost.
For a practical how-to on arranging this exact space, see organizing a top compartment. These renter-friendly steps keep meals visible, cut duplicates, and make shared kitchens calmer.
Upright and stand-up freezers: best for visibility when you have the floor space
Upright freezers give a pantry-style view so families can spot what they need in seconds. A vertical unit turns stacked packs into visible rows, which cuts duplicate purchases and reduces waste.

Why vertical units make contents easier to see
Stand-up models present foods on shelves instead of piled bins. That view helps a household find items fast and keeps the whole family informed.
How to set shelf zones from top to bottom
Keep a consistent plan so groceries do not drift. A simple sample:
- Top: light items and desserts
- Upper-middle: prepared meals and labeled soups
- Lower-middle: vegetables and mixed trays
- Bottom: meats and bulk proteins
Use medium clear bins with broad labels to group similar items and make pulls like drawers.
Door strategy for quick-grab foods
Reserve the door for small items and ready-to-go snacks. Divide door shelves with labels so every family member returns things to the right spot.
| Feature | Why it helps | Note |
|---|---|---|
| Visibility | Stops blind buys | Good for pantry-style storage |
| Bins & baskets | Prevent migrating items | Match bin width to shelf depth |
| Door shelves | Quick access for small packs | Warmer than interior—use tolerant foods |
Pros: easier scans and quicker retrieval. Cons: door-open loss of cold during long searches—zones and labels reduce that risk.
For upright models and practical picks, see a focused selection of upright freezers to match shelf depth and room requirements.
Product buying guide for freezer bins, baskets, and labels
Pick bins and tags that survive cold, resist frost, and make scans faster. This buyer guide helps readers choose products by material, airflow, durability, visibility, and ease of lifting out.

Clear plastic vs. wire baskets
Clear plastic wins for instant visibility and quick „pull-and-scan“ use. Check that products are rated for cold; thin plastic can get brittle and crack over time.
Wire baskets offer better airflow and long-term durability. They hide small items unless paired with labeled bags or grouped packs.
Perforated designs and durability
Choose perforated or wide-weave styles to reduce frost buildup and lower cracking risk. Perforation improves air circulation and keeps items drier over time.
Right-sizing and the lift-out test
Measure shelf depth, handle clearance, and drawer height before purchasing. Simulate a drawer lift-out at home with painter’s tape to confirm the fit.
Label styles that work
Compare options before you buy:
- Tape labels: fast, flexible, stick to bags and containers.
- Laminated tags: durable and reusable; DIY with contact paper.
- Hanging labels with zip ties: ideal for wire baskets and renter-friendly removal.
| Type | Who it suits | Pros | What to check |
|---|---|---|---|
| Clear plastic bins | Frequent scanners | High visibility, easy scan | Freezer-rated material, handle fit |
| Wire baskets | Long-term storage | Airflow, durable | Pair with labels for small items |
| Perforated bins | High-frost areas | Less frost, less cracking | Weave size and drainage |
Make sure to label the front of bins and door shelves so everyone returns like items to the right place. For product picks and tests to compare options, see this guided selection of recommended products.
Food management that keeps your system working: packing, dates, and meal planning
Consistent packing habits are the single most durable habit for a tidy freezer system. When packing is simple and repeatable, bins stay sorted and wasted food drops sharply.

Flat packs and cube-shaped containers
Flat packs: press air out, seal, freeze flat, then file vertically. This saves space and makes packs easy to scan.
Cube containers: work well for soups and batch staples because they stack tightly. Tradeoff: choose freezer-safe containers and leave headspace for expansion.
Labeling rules that prevent waste
Use clear labels that include: what it is, date packed, and simple reheating notes for prepared meals. Short, consistent labels help everyone use and reheat food safely.
Simple inventory options
Magnetic dry-erase board: the best way for quick updates and household use. Printed sheet: suits weekly planners but often falls behind.
- Boards are fast to edit; paper is durable for weekly checks.
- Update inventory when adding or removing items to make the system stick.
Odor control and rotation habits
Remove spoiled packs first. Place baking soda in an upper, well-circulated area to absorb smells. Deep clean only after spills or leaks.
„Newest to the back, oldest to the front.“
Keep a simple rotation rule, note storage times for safety, and use a board or sheet to make it easy. For kitchen prep tips and compatible bins, see kitchen prep tips and a practical pantry bins guide for containers that fit your routine.
Conclusion
A clear, repeatable plan starts with a short purge and ends with tools that match how you shop. , Keep steps simple: declutter, measure, set broad zones, then buy only items that solve a specific problem for that type of freezer.
Choose handled clear bins for quick pulls, durable labels for shared households, and flat packing to save space. For a bottom freezer, use low-profile zones and one lift-out bin. For a side freezer, pick narrow-shelf bins and a door strategy. For a chest freezer, add separators and a taped map for fast retrieval in a garage or utility space.
Make sure the system matches family habits. Start with one or two bins and a labeling method, then expand only if it truly saves time. A weekly tidy and one annual reset keep the way working for years.