We may receive a portion of sales if you purchase a product through a link in this article.
This introduction defines a practical renter style mix: a set of temporary, reversible upgrades that add personality without risking the security deposit.
Small apartments and compact homes face common problems: beige walls, dated fixtures, weak lighting, and scarce storage. This list focuses on fixes that improve look and function while staying tenant-friendly.
Each upgrade entry shows who it’s best for and lists pros, cons, cost range, difficulty, and how easy it is to remove at move-out.
Expect practical guidance: peel-and-stick walls, layered lighting swaps, reversible hardware, and clever storage that creates a focal point without clutter.
These choices are not magic. Surface prep, lease rules, and product compatibility matter. Seek permission when needed and document changes with photos to smooth move-out discussions.
Key Takeaways
- Temporary upgrades can boost comfort and curb appeal without forfeiting deposits.
- Solutions target common apartment issues: walls, lighting, storage, and finishes.
- Each pick includes who it’s best for, cost, difficulty, and removal notes.
- Peel-and-stick and reversible swaps balance low effort with big impact.
- Always check lease rules and document changes before installing.
What makes a renter-friendly style upgrade worth buying right now
A worthwhile purchase balances risk, effort, and clear payoff. The best upgrades are removable, reversible, and easy to patch when it’s time to move.
Start by checking deposit risk: can the change be removed cleanly? Can holes be filled and the wall returned to original condition? If not, skip it or get written permission.

Small-space payoff
In a small space, one strong focal point beats many small things. A feature wall or a lighting corner creates depth without clutter. Prioritize upgrades that improve daily comfort—better light, more storage, easier cleaning—before purely decorative projects.
When to ask the landlord first
Ask before painting, swapping hardwired fixtures, or applying strong adhesives to unknown paint finishes. Landlords often accept paint if tenants repaint to the original color, but hardwired changes usually require permission and a licensed electrician.
- Quick compatibility checklist: surface texture, humidity exposure, heat zones, and fragile paint.
- Document before/after photos and store original hardware for fast move-out resets.
- Each upgrade entry will be judged by impact on the room, install time, and how it removes from walls without damage.
For more renter-friendly wall decor ideas and product picks, see this best wall decor guide.
How to choose the right renter style mix for your home, room, and budget
Pinpoint the top flaw — beige walls, blunt overhead lighting, or no storage — and start there. Choosing one problem keeps projects focused and saves time.

Pick the problem first
Match upgrades to impact. If the overhead light is harsh, swap in warmer bulbs or add lamps before painting. If clutter makes a space feel small, add closed storage or multifunctional furniture.
Match the upgrade to the room
Bathrooms and kitchens need moisture- and heat-safe fixes—peel-and-stick backsplashes and adhesive shelves work well. In a living room, prioritize a focal piece and durable textiles that change the room’s look.
Plan for move-out
Save originals. Keep removed hardware in labeled bags, store old fixtures, and keep leftover paint for touch-ups. Choose plug-in lighting and peel-and-stick options so most purchases move with you to a new apartment.
- Budget tiers: small swaps (knobs, switch plates) → mid-cost (lamps, rugs) → higher-cost (peel-and-stick walls).
- Function first: buy for better light, more usable storage, easier cleaning, or a clear focal point.
- When to hire: leave electrical or major installs to a pro to avoid lease issues and damage.
Peel-and-stick wallpaper that upgrades walls fast (without permanent design changes)
When painting isn’t an option, peel-and-stick wallpaper delivers fast, reversible color and pattern for a single wall or accent corner. It’s ideal for living rooms and bedrooms where a focused change creates the most big impact.

Best for
Use on one statement wall in a small living room or behind a bed. A mural or bold print works well as a focal point; small prints suit narrow rooms.
Buying considerations
- Finish: matte hides seams, satin reads richer under lamps.
- Scale: tiny repeats for tight spaces; large motifs for a single feature wall.
- Order more: buy extra rolls for pattern match and mistakes.
Installation and removal
Don’t be fooled by tutorial speed. Alignment, corners, and bubbles take time. Hire a TaskRabbit or a wallpaper pro for tricky layouts.
„Prep and a smooth surface make peel stick paper behave—textured plaster is the common failure point.“
For removal, warm the adhesive, peel slowly at a low angle, and use mild cleaner for residue. Test a hidden patch first to avoid paint lift.
Pros and cons
Pros: big visual change without holes, easy seasonal swaps, and reusable leftovers for touch-ups. Cons: can overwhelm tiny rooms or fail on rough walls.
Paint updates that still feel renter-safe (including a front door accent)
A targeted paint update can brighten walls and add personality with little long-term risk. It’s a simple way to fix bland beige when the lease allows careful changes.
Best for: those who want brighter rooms or a single color moment on a front door without repainting an entire space. Painting one interior door gives high impact for low effort.

Buying considerations and landlord-friendly plan
Many landlords accept temporary painting if the tenant agrees to repaint to the original shade. Offer a written plan: prime as needed and commit to returning the original color at move-out. Keep a labeled sample of the original paint for matching.
- Sheen: use semi-gloss for doors and trims for durability.
- Primer: required over dark or glossy surfaces.
- Budget: include brushes, tape, drop cloth, and a small can for touch-ups.
- Example: Sherwin-Williams Coral Perfection works as a bold interior door accent; some landlords may allow it to remain.
| Benefit | Typical Cost | Move-out effort |
|---|---|---|
| High visual impact | $20–$60 (small can) | Repaint or touch-up |
| Low material cost | $10–$30 (supplies) | Store leftovers |
| Easy to reverse | Depends on labor | Document original condition |
Realistic pros: big change for little money. Cons: prep time and potential repainting later. Store receipts, keep leftover paint, and photograph original walls before starting to protect the deposit and make move-out easy.
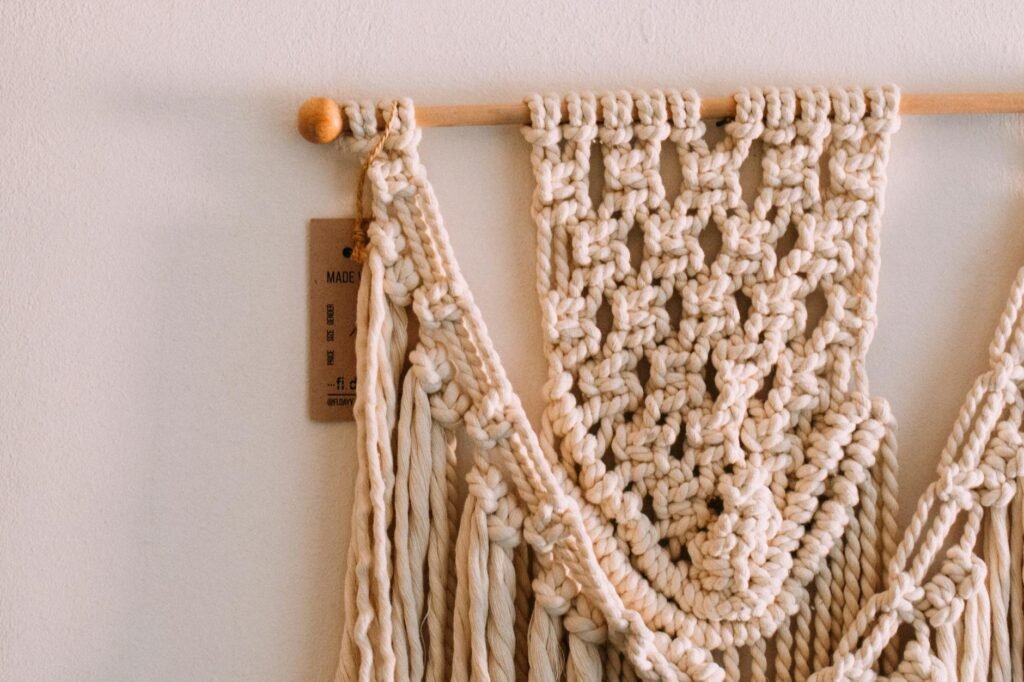
Damage-free gallery wall upgrades using adhesive frames and photo tiles
A blank wall doesn’t need holes to feel finished; adhesive photo tiles and lightweight frames solve the problem. These options let households add bold, personal art without anchors or a drill.

Who benefits and what problem it solves
Best for: people who move often, small-space dwellers, and seasonal decorators who want quick swaps. Adhesive tiles address the common no-drill, no-damage limitation while adding clear visual polish.
Layouts that work in tight apartments
- Grid: calm symmetry for narrow living rooms.
- Stagger: relaxed rhythm for above a sofa or bed.
- Narrow columns: perfect for slim walls near doors or hallways.
Buying and placement tips
Choose frame color to match trim: black for contrast, white for airy rooms, or wood tones for warmth. Match print size to wall width and use a cardboard spacer to keep 2–3 inches between pieces.
Placement rule: aim for the visual center at about 57–60 inches from the floor and keep the bottom edge 6–8 inches above furniture to avoid a „floating“ look.
Pros and cons versus traditional frames
- Pros: repositionable, minimal damage, fast install.
- Cons: adhesion drops on very textured paint and weight limits restrict heavy frames.
„Clean, smooth paint gives the best adhesion; test a hidden spot before you commit.“
| Field | Example | Best room |
|---|---|---|
| Tile count | 4–9 | Living room |
| Ideal wall width | 3–8 ft | Hallway, entry |
| Repositionable | Yes (most brands) | Bedrooms, rentals |
For more curated picks and practical buying advice, see this best wall decor guide.
Floating shelves and wall-mounted storage that won’t overwhelm a small room
A slim wall shelf can turn empty wall into a useful drop zone and subtle display.

Best for quick vertical fixes
Use floating shelves to reclaim vertical space in a narrow entry or tight living room.
They act as a compact landing spot for keys, a small bowl for mail, and a place for one plant or framed photo.
Renter-friendly mounting options
Adhesive hooks suit very light loads—think a small shelf with trays or hooks for keys.
They avoid drilling and leave minimal marks.
Minimal screws with short anchors are better for heavier loads.
Patch and touch up paint at move-out to restore the wall.
What to store and display
- Keep it tidy: one functional item (tray or small bin), one decor piece, and one greenery element.
- A shallow shelf (6–8″ depth) keeps walkways clear and reduces visual clutter.
- Pair a shelf with mirrors nearby to bounce light and make the space feel larger.
| Question | Recommendation | Why it works |
|---|---|---|
| Depth | 6–8 inches | Won’t protrude into the space |
| Load | Light to medium (check weight rating) | Prevents adhesive failure |
| Finish | Wood or neutral tones | Blends with existing decor |
„Limit items and vary heights to keep shelves looking styled, not cluttered.“
Pros: adds storage and display without bulky furniture; uses dead vertical space. Cons: requires precise install, has weight limits, and may need patching if screwed in.
Lighting fixes for rentals: softer bulbs, lamps, and under-cabinet puck lights
Layered lighting—warm bulbs, floor lamps, and under-cabinet pucks—solves stark ceiling glare quickly.
Best for: older apartments with a single ceiling fixture, studio layouts that need zones, and anyone who wants a cozier look at night.

Puck lights and where they work best
Puck lights shine under kitchen cabinets for task light, inside display cabinets for soft evening glow, and in dark corners to open small rooms. Battery options avoid hardwiring; plug-in strips are better for long work sessions in a kitchen or bathroom.
Buying considerations
- Battery life: AA/AAA vs. rechargeable — pick rechargeables for regular use.
- Control: remote or app control for dimming, color temperature, and timers.
- Color temperature: 2700K–3000K reads warm and relaxed; higher kelvins feel clinical.
„Swap one harsh bulb for layers of warm light and the whole room feels livable.“
| Feature | Typical range | Why it matters | Best pick |
|---|---|---|---|
| Lumens | 150–600 | Task vs. ambient needs | Puck 200–300 lm |
| Power type | Battery / Plug-in / USB | Installation freedom | USB rechargeable |
| Control | Remote / App / Manual | Ease of daily use | Remote + timer |
| Adhesive | Removable / Permanent | Surface safety and humidity | Removable foam pads |
Quick placement tips: hide cords behind furniture, use paint-matched cord covers, and place floor lamps near seating to anchor a zone. For more product picks and practical guidance, see these cozy lighting picks.
Plug-in or battery wall sconces that create a designer look without hardwiring
Plug-in and battery sconces deliver focused, hands-free lighting that suits small apartments and compact bedrooms. They free up surfaces and give a clean, elevated look without ripping out ceilings or hiring an electrician.

Best for
- Bedside reading where no nightstand fits.
- Entries and hallways that need a soft glow.
- Highlighting art on a wall without hardwiring.
Buying considerations
- Power: plug-in vs. battery — weigh convenience and run time.
- Brightness: check lumen output for reading vs. ambient light.
- Mounting: adhesive pads or included brackets; verify adhesive strength.
- Finish: cord length and cord covers for a tidy wall line.
Pros and cons vs. table lamps
| Feature | Plug-in/Battery Sconce | Table Lamp |
|---|---|---|
| Footprint | Zero tabletop | Uses surface space |
| Cord visibility | Concealable with covers | Often visible near outlet |
| Flexibility | Fixed on wall | Easily moved |
Placement tip: align sconce centers with headboards for bedside use, or center above a console to light art. Use bulbs rated for enclosed shades and avoid heat buildup near fabrics.
Swapping dated ceiling fixtures (what’s realistic for renters)
A single pendant or updated vanity light can change how a room reads and how it feels at night. Many tenants can swap a flush ceiling light or a vanity bar with a plug-in or hardwired replacement—if they follow lease rules and safety steps.

Best for
Ideal candidates: those wanting a statement pendant over a dining table or a more current bathroom vanity light. These swaps solve the common problem of a boring, low-quality fixture that flattens a room’s design.
Safety and permissions
- Ask the landlord in writing before any hardwired swap.
- Turn off the breaker at the panel—not just the wall switch—and verify power is off with a tester.
- Hire a licensed electrician for uncertain wiring or if the fixture has multiple circuits.
Move-out plan
Label screws, bag small parts, and place the original fixture in a sturdy box. Photograph wiring and mounting before removal to simplify reinstallation.
| Option | What it upgrades | Pros | Cons |
|---|---|---|---|
| Statement pendant | Living/dining lighting | High visual impact; better ambient light | May need support; permission required |
| Bathroom vanity swap | Bathroom task light | Improves task lighting and design | Possible code or GFCI concerns; landlord OK needed |
| Plug-in or battery sconce | Bedside or accent light | No hardwiring; reversible | Visible cord or battery changes |
Realistic takeaway: Cosmetic lighting swaps deliver big payoff but require simple safety habits and a documented move-out plan. For step-by-step how-tos or creative fixture ideas, see this practical guide from IKEA Hacks for renters.
Peel-and-stick backsplash for rental kitchens that need a cleaner look
A clean backsplash can make a tiny kitchen feel finished in an afternoon without a single tool.

Best for: small kitchens and apartments where a backsplash becomes the room’s focal point and where renovation isn’t allowed. Peel-and-stick options hide stains and provide an easy-to-clean surface behind the sink and stove.
Buying considerations
Confirm heat resistance near ranges and steam tolerance at sinks. Choose materials labeled water-resistant or ceramic-look for wet zones.
Match the finish to existing surfaces—gloss hides grease, matte hides seams. Test a small sample on the actual wall to verify adhesion.
Where it works beyond kitchens
These sheets suit laundry room walls, bathroom vanities, and some fireplace surrounds (check clearance). They provide a quick visual refresh without permanent changes.
Pros and cons: sheets vs. peel-and-stick tiles
| Feature | Sheet panels | Peel-and-stick tile |
|---|---|---|
| Install speed | Very fast—fewer seams | Slower—individual placement |
| Realism | Less texture; clean look | More authentic tile depth |
| Cutting & fit | Easier for long runs | Better for awkward edges and patterns |
| Cost per sq ft | Typically lower | Often higher for ceramic-look tiles |
Quick takeaway: pick sheets for speed and fewer seams; choose tile-look for realism and pattern. For curated product picks and a buyer’s guide, see this best removable backsplash options.
Peel-and-stick floor tiles for kitchens and bathrooms with outdated floors
A worn floor can make an otherwise tidy kitchen or bathroom look tired and dated overnight.

Best for: small kitchens and bathrooms with old vinyl or cracked tile where a full replacement isn’t allowed. This low-effort project refreshes the room’s look without permanent work.
Prep that matters
Clean thoroughly. Remove grease, wax, and residue.
Let the surface dry fully—adhesive needs a dry floor to stick reliably.
Map the layout. Dry-lay tiles so cuts fall in less visible areas.
Buying considerations
- Thickness and wear layer: thicker tiles wear better in high-traffic zones.
- Slip resistance: essential for bathroom safety—check ratings.
- Pattern and color: checkerboard or starburst can change perceived room size and color balance.
Pros and cons
Pros: fast install, reversible, and cosmetic uplift.
Cons: seams can lift with moisture and heavy cleaning; adhesion varies by subfloor.
„Test a small area and keep originals for a clean move-out.“
| Feature | Typical rating | Recommended subfloor |
|---|---|---|
| Wear layer | 0.3–0.7 mm (higher is tougher) | Clean, level vinyl or tile |
| Water resistance | Waterproof to water-resistant | Seam-sealed over grout in bathrooms |
| Best use | Kitchen, bathroom, entry | Low-slope, dry areas preferred |
Practical note: Ask the landlord when required, test adhesion, and plan removal. For ready-to-install options, compare peel-and-stick tiles and find product choices like these peel-and-stick tiles.
Hardware swaps that modernize cabinets and drawers in minutes
A simple hardware swap can change how cabinets read and refresh a room in under an hour. This fix targets kitchens and bathrooms where aged knobs flatten the whole look.

Best for
Ideal for: older cabinets with dated knobs or empty drawers that need a quick uplift. It fits anyone who wants visible impact without painting or heavy tools.
Buying considerations
- Measure hole spacing before you buy so pulls fit existing holes.
- Match new finishes to faucets and lighting for a cohesive furniture and fixture feel.
- Buy correct screw length and check whether pulls cover old marks.
- Save originals in labeled bags and photograph each cabinet run for easy reinstall at move-out.
Pulls vs. knobs: practical tradeoffs
Pulls offer better grip and suit wider drawers. They give a modern, linear look but add visual weight on small cabinets.
Knobs are compact and easy to clean. They feel lighter visually but can be harder to use on large drawers.
„Store originals by drawer and keep a photo; reinstalling later is the easiest way to protect a deposit.“
| Feature | Pulls | Knobs |
|---|---|---|
| Grip | Better for heavy drawers | Good for small doors |
| Visual weight | Stronger design presence | Subtle, minimal look |
| Cleaning | More edges to wipe | Simple surface |
| Installation | Requires exact spacing | More forgiving of misaligned holes |
Quick tip: pick finishes that echo existing metals rather than chasing trends. For coordinated storage and hardware ideas in the kitchen, see this kitchen organizers.
Decorative switch plates for a small upgrade with a surprisingly big impact
Small details can recalibrate a room; decorative switch plates do that quietly and cheaply.
Best for
Best for: adding detail when your walls and finishes feel bland
They help when the walls still read generic after larger upgrades. A new plate draws the eye at entry points, hallways, and beside a focal wall. It’s an inexpensive way to make the space feel edited without changing major finishes.

Buying considerations
Match the plate type (toggle vs. rocker) and confirm multi-gang sizing. Pick a finish—brass, matte color, or printed motifs—that ties to nearby metals or textiles.
If a plate doesn’t include matching screws, a dab of nail polish on screw heads blends them in. Prints should be small-scale in narrow spaces so they don’t overwhelm.
Pros and cons
- Pros: Low cost (~$20), fast install, reversible, and immediate visual lift.
- Cons: Limited if larger problems remain (poor lighting, storage). Some adhesives or heavy designs can need careful removal.
„A coordinated plate is a small move with a tidy, design-forward payoff.“
| Feature | What to check | Why it matters |
|---|---|---|
| Fit | Toggle vs. rocker, single vs. multi-gang | Prevents awkward gaps and ensures the plate sits flush |
| Finish | Brass, painted, printed | Ties into room metals and overall decor |
| Screws | Included or match color with polish | Keeps the look seamless at close range |
Place these plates where people notice them first. For practical placement ideas and visual examples, see practical placement ideas.
Shower head swaps for better water pressure and a spa-like bathroom feel
A different shower head often improves how the water feels, even when the plumbing can’t be changed. This is a quick, mostly tool-free upgrade that usually screws on by hand and is reversible at move-out.

Best for
People dealing with low flow or an awkward handheld setup benefit most. It’s ideal for small bathrooms where a simple change delivers daily comfort without rewiring or a plumber.
Buying considerations
- Spray settings: multiple patterns improve rinse feel more than raw pressure.
- Flow rate: check GPM—choose models balancing coverage and conservation.
- Installation: look for tool-free or hand-tight designs and include plumber’s tape for a leak-free seal.
Pros and cons
Fixed heads give broad coverage and a steady stream. They look cleaner and free hands for soap and shampoo.
Handhelds add reach for cleaning and kids, but some cheap ones reduce perceived pressure.
„A good spray pattern can make the shower feel stronger even if the household pressure is unchanged.“
| Feature | Fixed | Handheld |
|---|---|---|
| Coverage | Wide, consistent | Targeted, adjustable |
| Cleaning | Less versatile | Better for rinsing and tub cleaning |
| Installation | Usually tool-free | Often tool-free; hose adds weight |
Move-out tip: save the original head and reinstall it to keep things simple with the landlord and protect the security deposit.
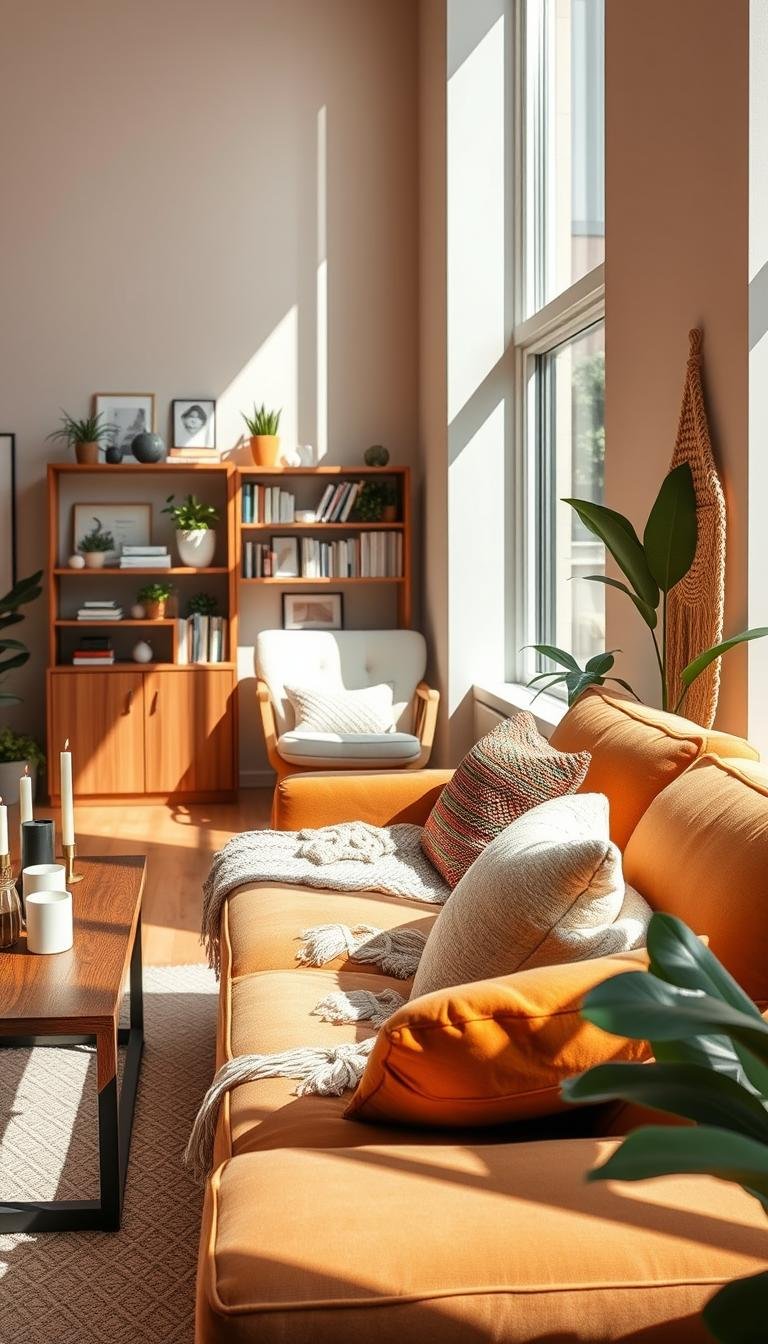
Textile upgrades that warm up a rental fast: drapes, rugs, and pillow covers

Well-chosen textiles can make windows look larger, hide tired floors, and pull furniture into a cohesive room. They work fast and are easy to swap by season.
Best for small rooms and neutral apartments
Who benefits: people with bland rooms that need a finished look without painting or new flooring. Soft goods add warmth, pattern, and color at low cost.
Drapes as an apartment-approved wall treatment
Hang panels wider and higher than the trim to create the illusion of taller windows and higher ceilings. Choose light-filtering or blackout panels based on light control needs.
Rug strategies for problem floors and studios
- Use a large rug to anchor furniture so pieces sit partially on the rug instead of floating.
- Layer a smaller patterned rug over a neutral base rug for depth and texture.
- In a studio, define zones—sleep, work, and living—by changing rug size or placement.
Buying considerations
- Materials: washable fibers for high-traffic rooms; synthetic low-pile for dining/kitchen areas.
- Sizes: pick a rug that fits under the front legs of sofas and chairs in small rooms to visually enlarge the space.
- Colors: choose seasonal pillow covers to refresh a room without new furniture.
Pros and cons versus harder projects
Pros: low risk, portable, immediate impact, and easy seasonal swaps. Soft goods also soften echoes and add comfort.
Cons: they don’t fix functional issues like poor lighting or storage. For those problems, pair textiles with lamps or storage solutions for a full-room upgrade.
| Item | Best for | Quick tip |
|---|---|---|
| Drapes | Make windows look bigger | Hang 6–12″ above trim, extend rod 12–24″ beyond frame |
| Rugs | Hide floor, define zones | Small room: leave 12–18″ of floor visible around edges |
| Pillow covers | Seasonal color swaps | Buy 20% larger insert for a plump finish |
Conclusion
A problem-first approach helps make practical purchases that improve daily life. Focus on fixes that are reversible and useful—better light, a cleaner wall or backsplash, and smarter storage—so the home feels better without risking the deposit.
For most apartments start with lighting, then tackle the most visible wall or backsplash, and finish with small hardware and textile swaps. Keep originals, label parts, and photograph before-and-after to simplify move-out resets.
Choose your first buy by the biggest daily annoyance: bland walls, harsh overhead light, dated finishes, or limited storage. For renter-friendly wall ideas see this wall makeovers, and for cohesive decor picks try this aesthetic decor guide.
Measure surfaces, check compatibility, and ask permission when required so purchases work now — and in the next home.